Content Type
Configure / Manage your content type
Information
The first tab is called “informations”, these pieces of information are for admin purposes and won’t be directly shown on frontend.
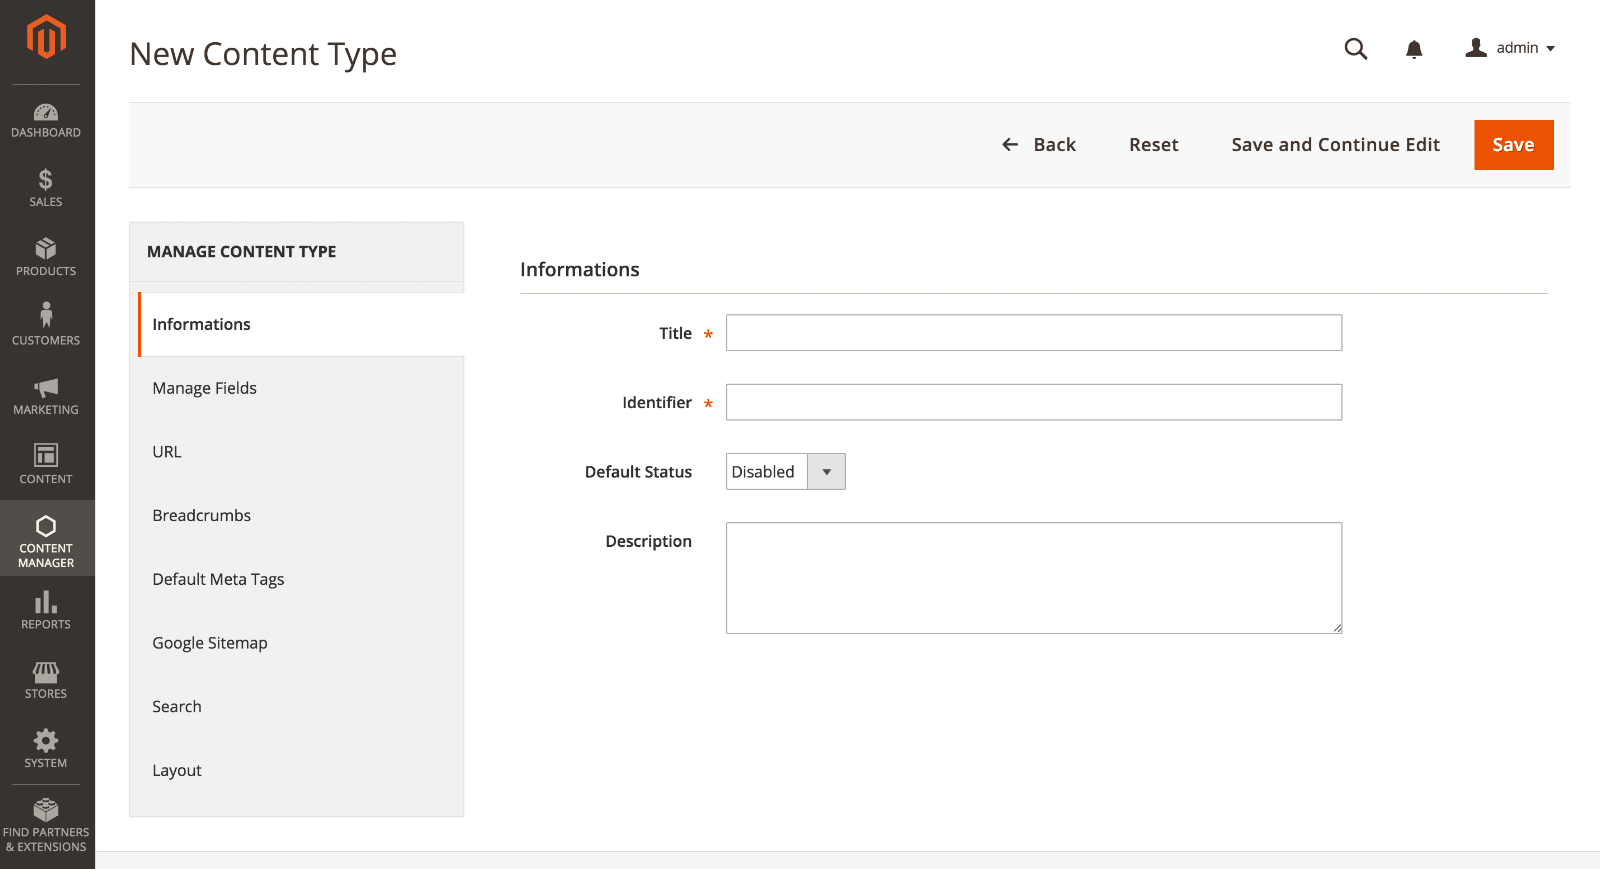
- Title: Name of your content. For admin purpose.
- Identifier: Unique ID which identify your content type. This key will be used to create list of contents, and is also used for template redefinition.
- Default Status: Status (Enabled/Disabled) suggested by default when creating a new content of this content type.
- Description: Description is also used in admin only, this is a reminder text for admin users that define what this content type is used for.
- Group Identifier: All content types sharing the same Group Identifier are displayed together, under that name, in the admin menu (CMS → your content types). Leave empty to display the content type under "Other Contents". Refresh the config cache to apply changes.
Manage fields
(v. 1.x : Before being able to create fields, you must save your content type once. This is not necessary on v2.x).
Default Title Value
This field define the default title that will be suggested when you will create a new content.
You can use replacement patterns to auto-build your title.
For example, if you have a field named “firstname”, another one named “lastname” and you are creating a testimonial content type. Then you can set your default title to:
Testimonial of
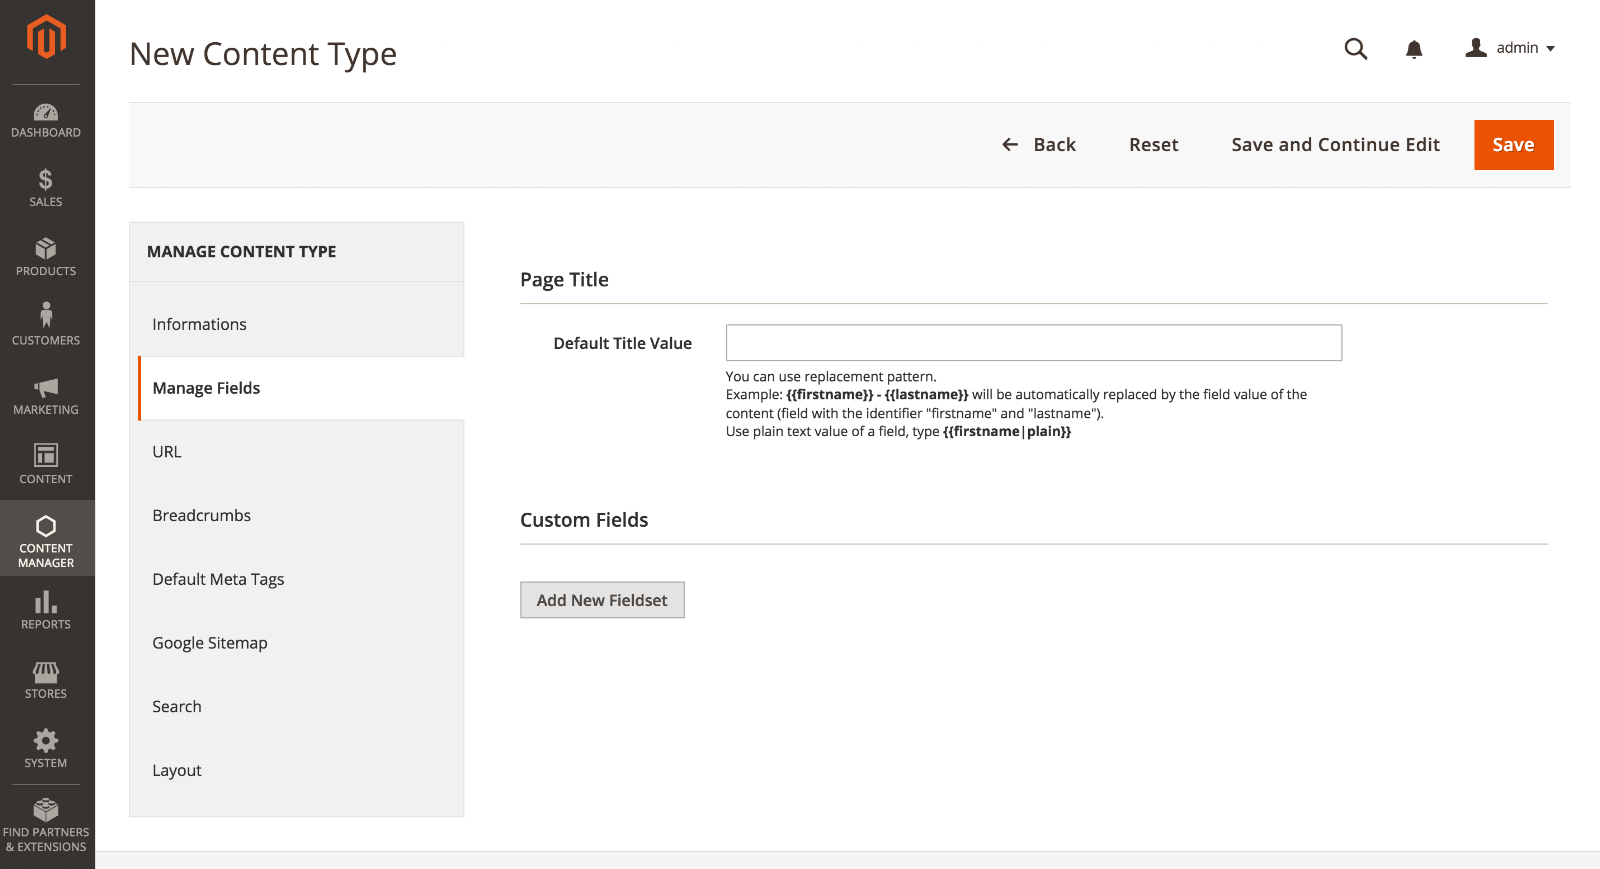
Add New Fieldset
Adding an new fieldset will set an area in which you will create your fields.
Add at least one fieldset, named “general” for example.
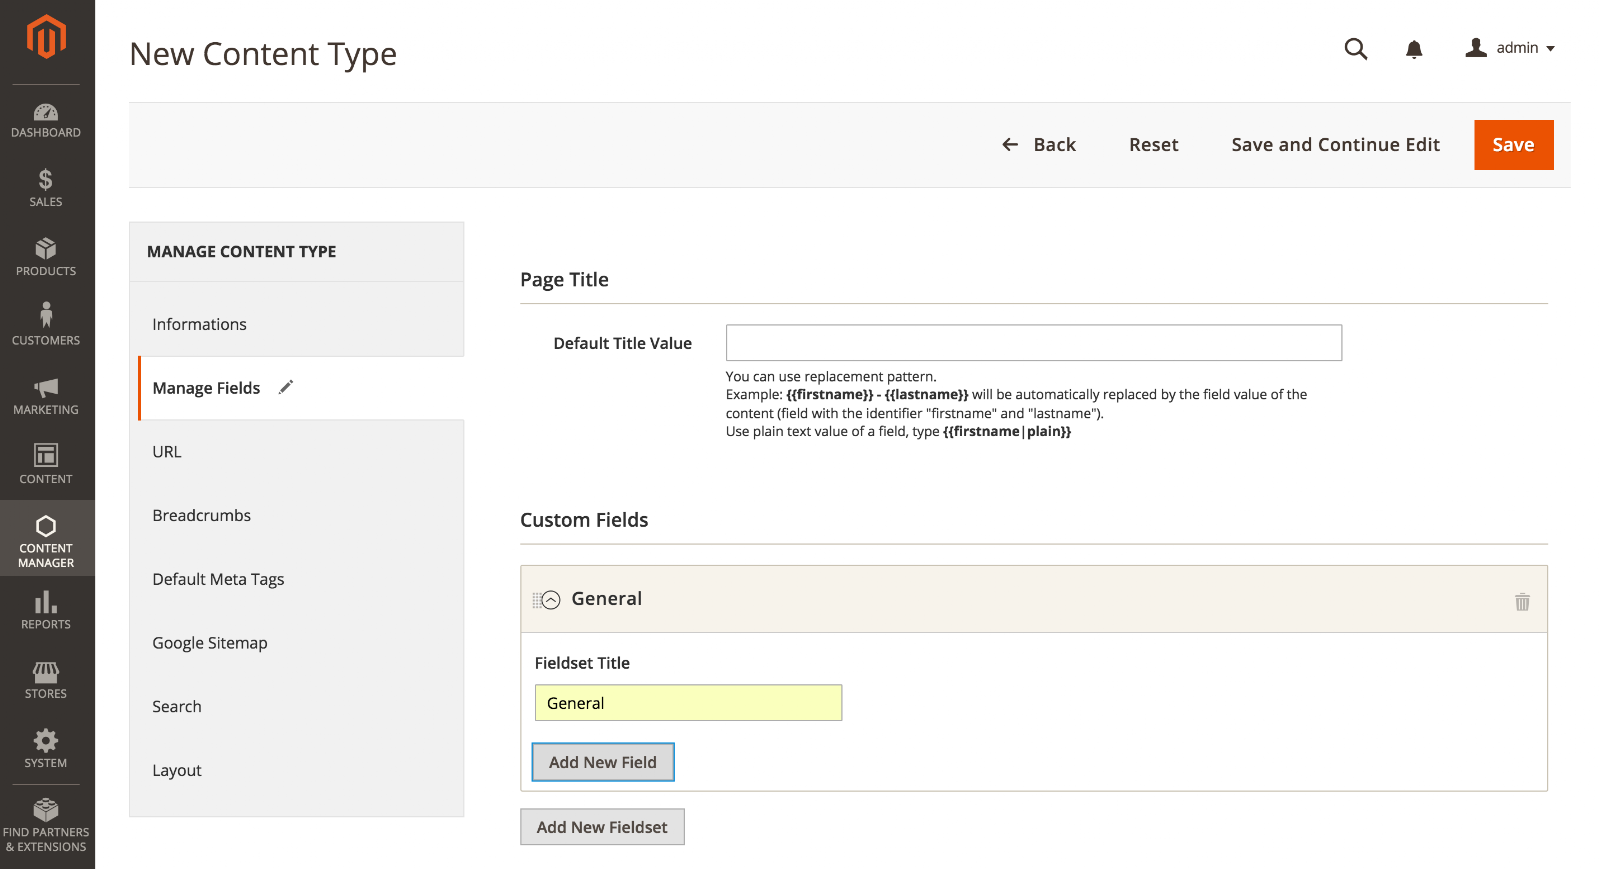
After adding your first fieldset, you will be able to create fields.
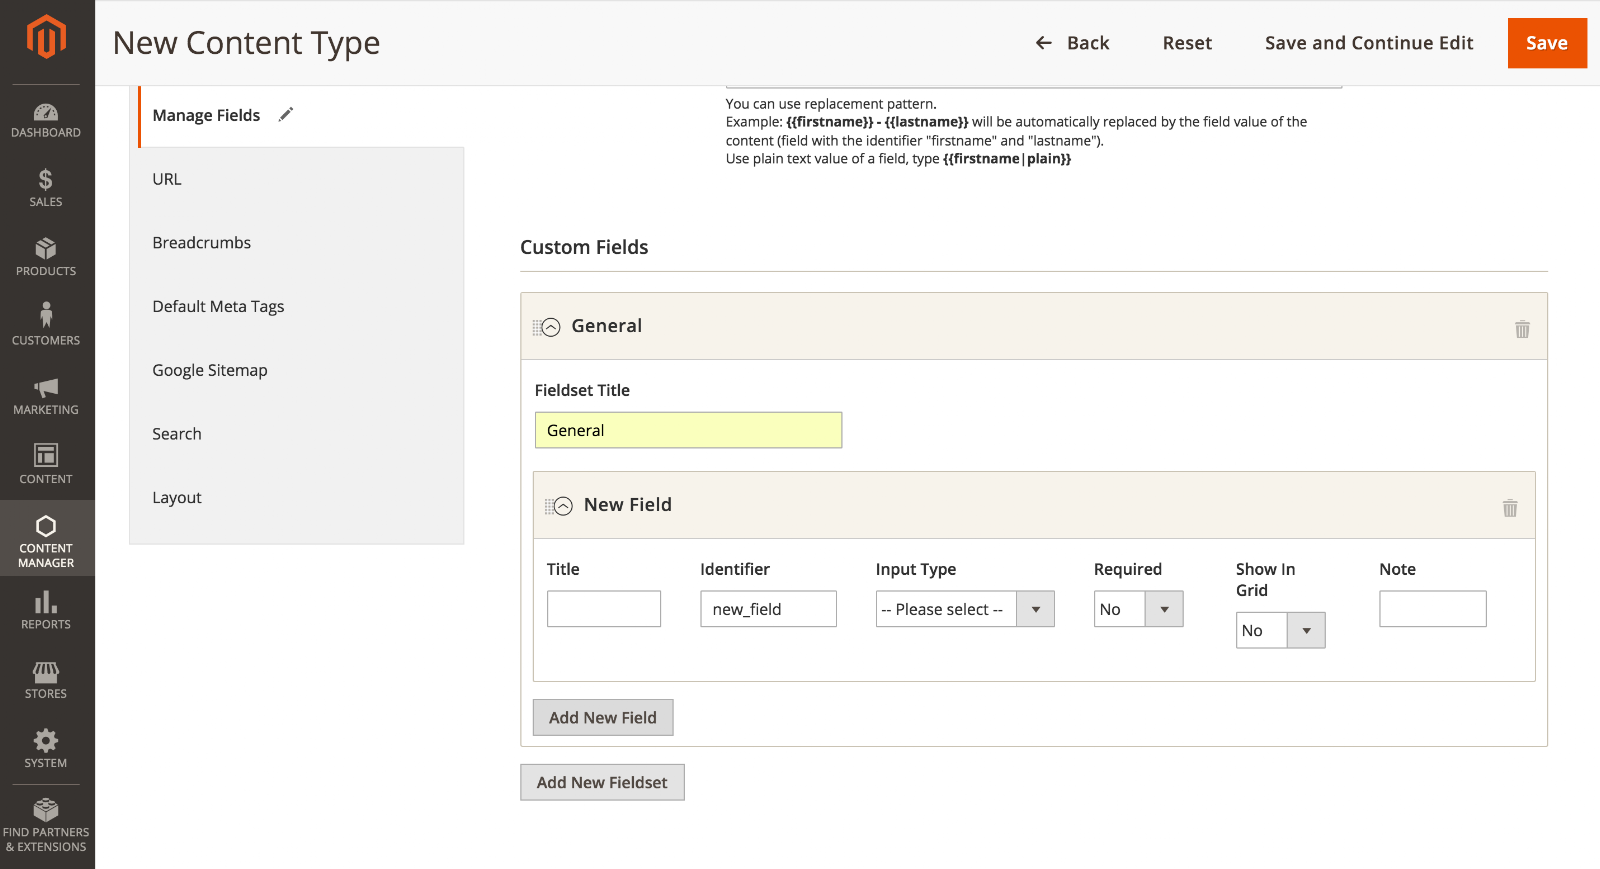
Add new Field
Click on Add New Field button to create a new field in the corresponding fieldset.
Title: Title of your field
Identifier: Unique ID, used for template redefinition and custom script
Input Type: Define the type of the field, check out Field types definition to get details for each field type.
Is Required: Define is the field will be a required field when creating a new content.
Show in grid: Define if the value of the field will be listed in the contents grid (CMS → Your content type name)
Note: A note which will be displayed under the field to help the webmaster, or give information about this field.
Organize your fields
These fields will build the structure of your content, subsequently available in the Content Manager → Your content section.
For readability purposes, you can add more fieldsets and group your fields by them.
You can drag and drop your fields between fieldsets, or themselves by using the dotted left border.
Manage URLs
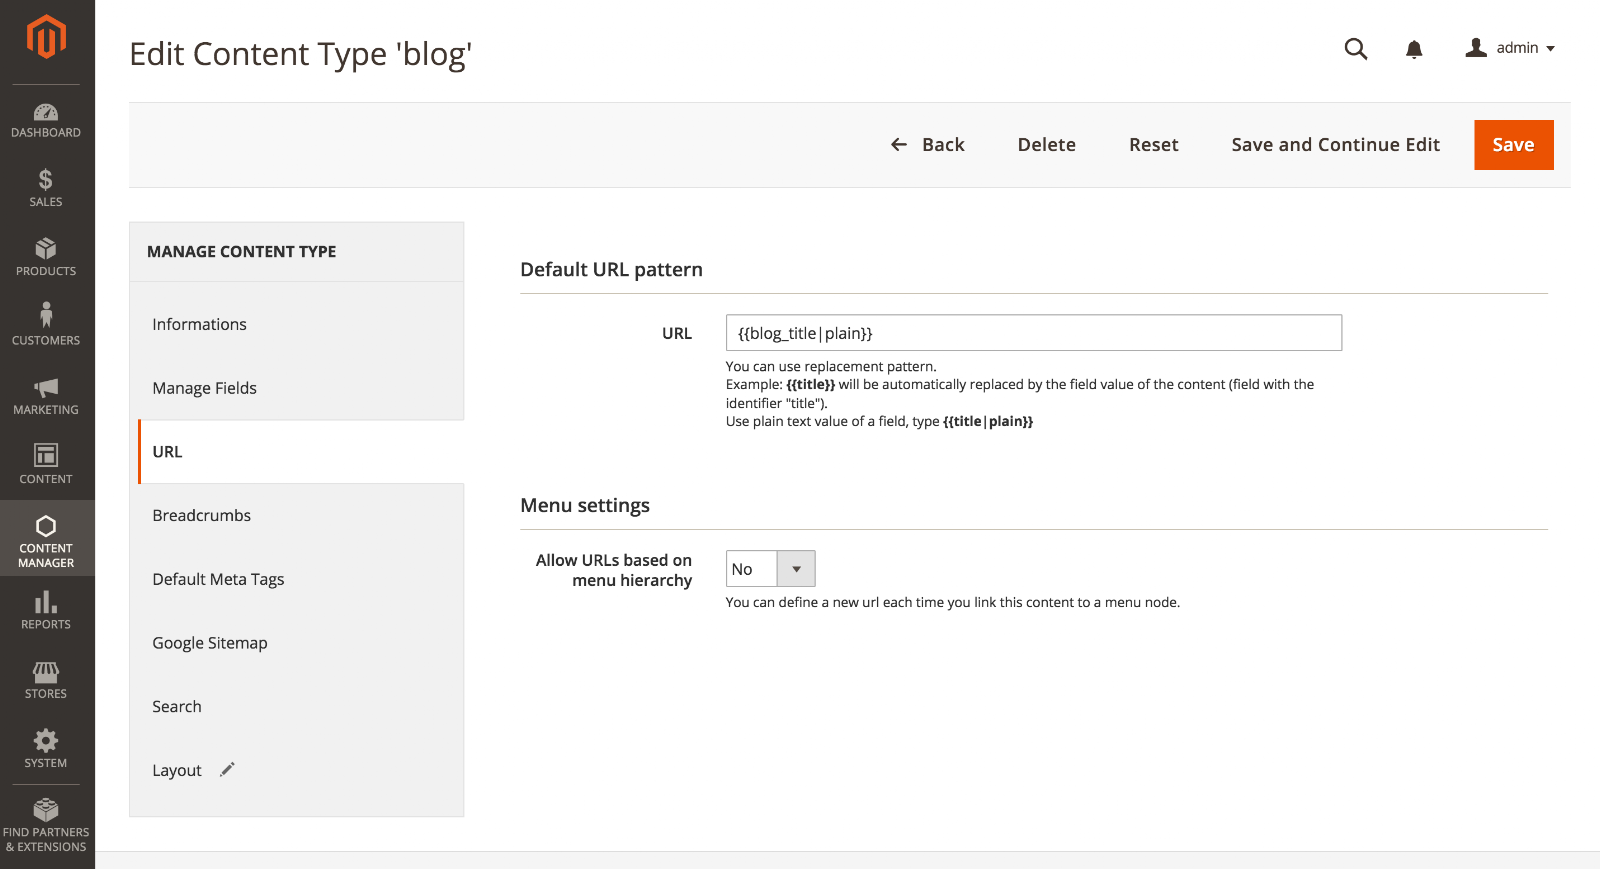
This section define the default url that will be suggested when you’ll create a new content.
Visibility
This required field defines the visibility strategy of the content type:
- Visible [New Page] (Render the data from an URL): contents of this content type each get their own frontend page/URL.
- Not Visible [No Page] (Only data storage, but can be used in widgets): contents of this content type are not rendered as standalone pages and have no URL; they are only usable as data (e.g. through widgets, relation fields, or repeater fields).
Switching an existing content type to Not Visible removes its contents' URL rewrites. On a Not Visible content type, the "Search Engine Optimization" and "Open Graph" fields are hidden by default on the content edit form — see System Configuration to show them back if needed.
Default URL pattern
If you leave the URL empty, you’ll need to set it manually for each content you will create. Alternatively, you can set a replacement pattern to auto-build your URL (see below the section “About Short Codes”).
About Short Codes
Short codes are used to build patterns using the values of your content fields.
Short codes are defined by the identifier of a field included by two curly brackets, like this: .
If the field used could have somes html characters, you can specify to ignore them by adding a pipe and the code “plain”, as this : .
For example, if you have a field named “firstname”, another one named “lastname” and you are creating a testimonial content type. Then you can set your default title to:
Manage Breadcrumbs
This section helps you set the breadcrumbs path of yours contents.
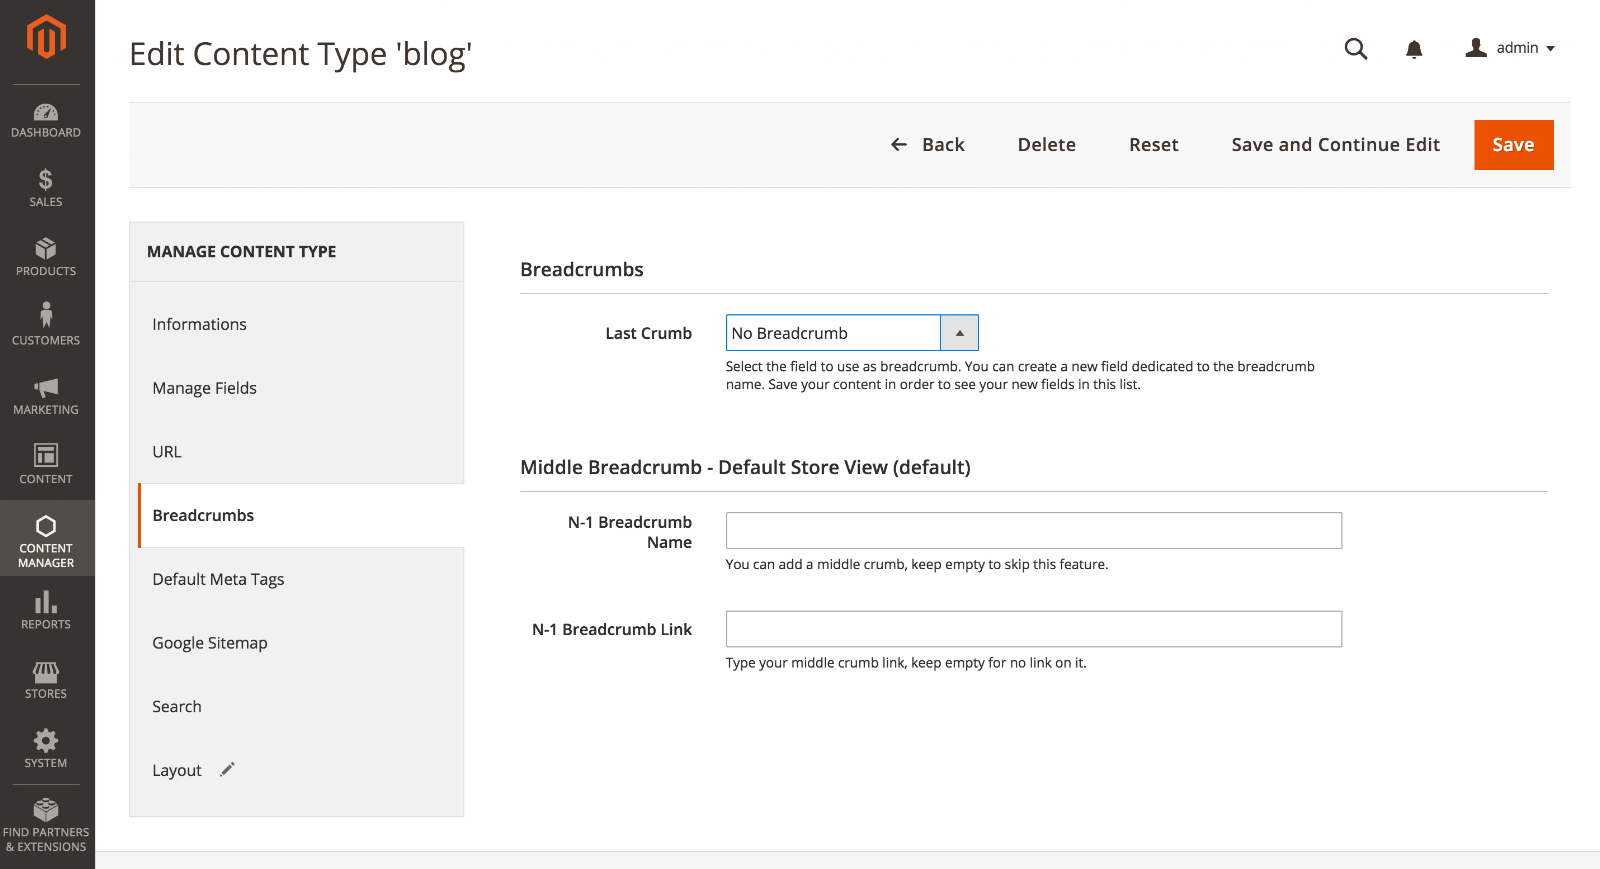
You can define :
- The Last Crumb by choosing one of your field
- For each Store view: the name and the link used by the N-1 level.
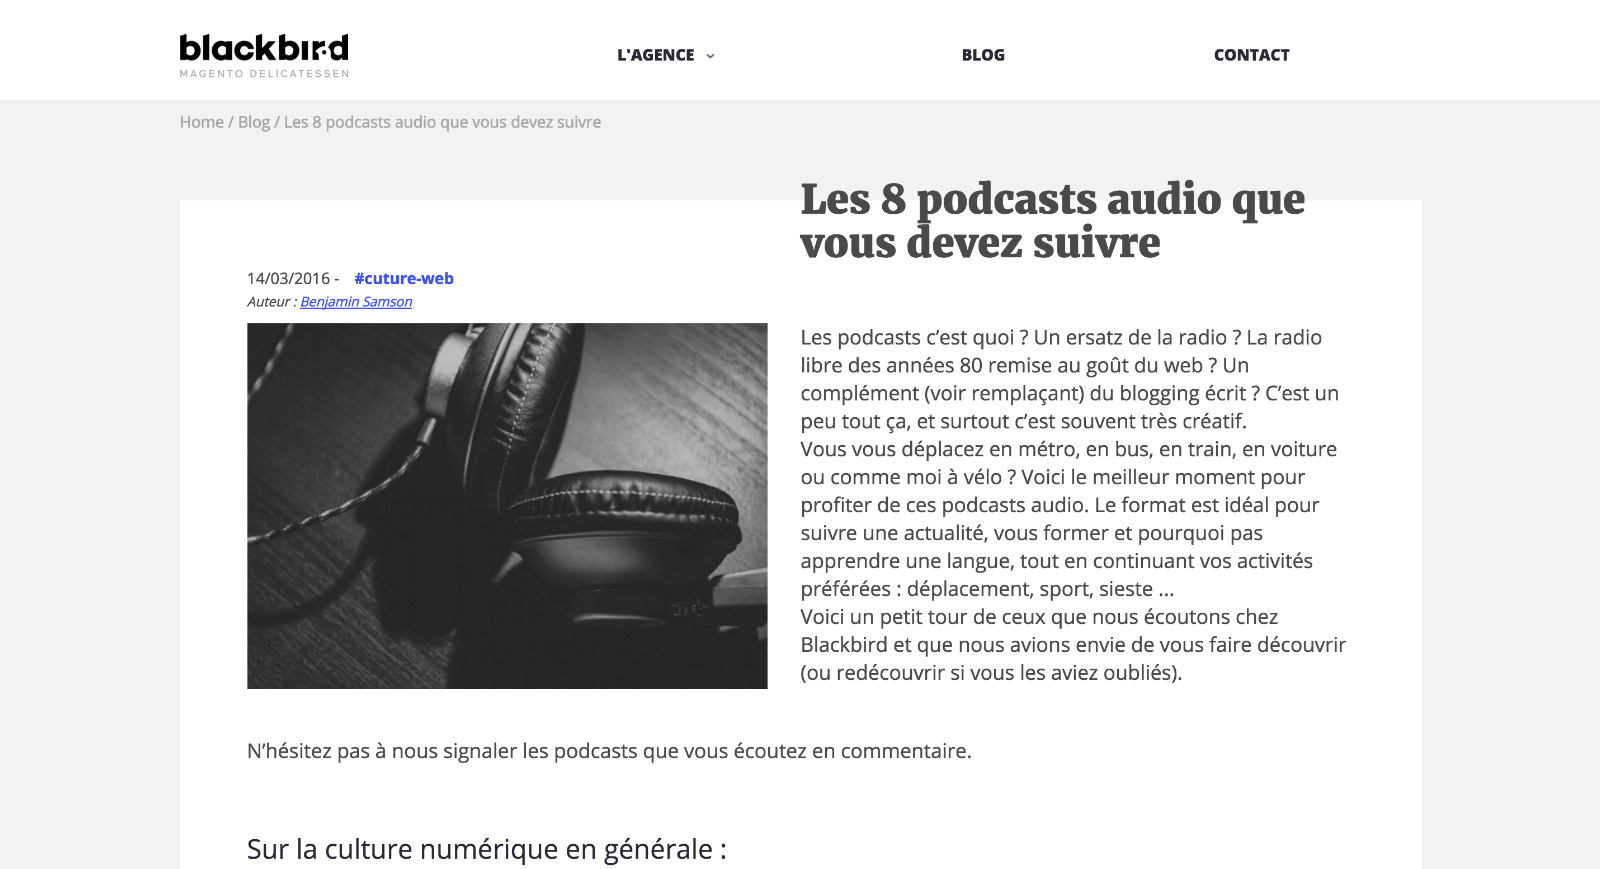
In this following example :
“Les 8 podcasts audio que vous devez suivre” is the Title field
“Blog” is the N-1 Breadcrumb Name.
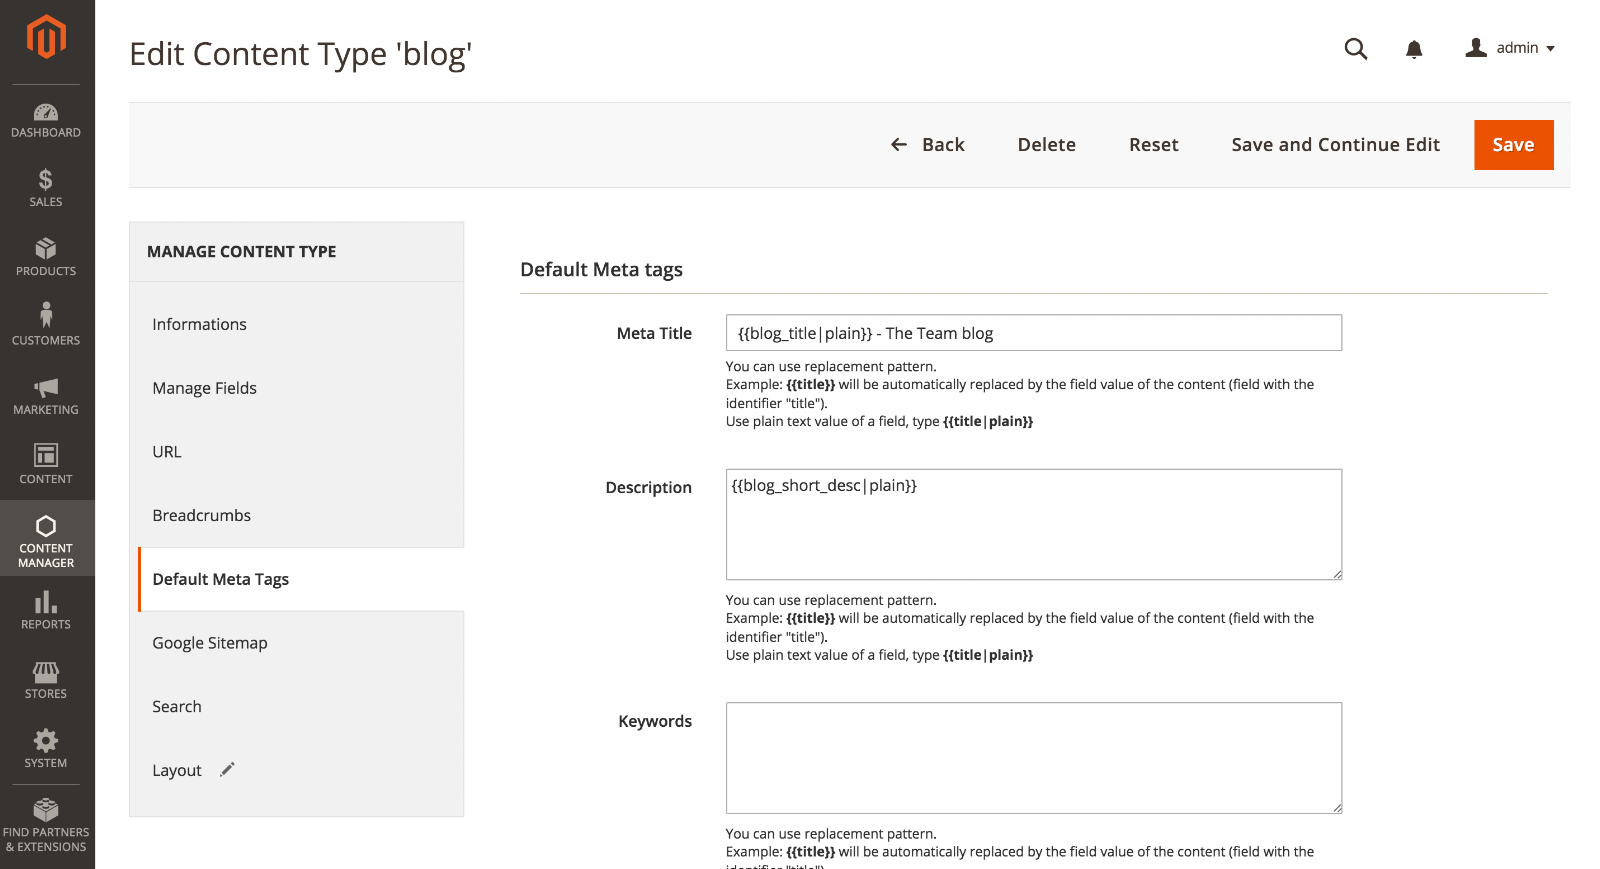
Manage Default Meta tags
This section define the default meta tags fields that will be suggested when you will create a new content. You can use replacement patterns to auto-build your meta-tags.
For example, if you want your meta description to use your content “small_description”:
Use “|plain” to have the plain value of the attribute, otherwise it won’t replace special characters.
This section allow to set: Meta description, meta keywords, robots and open graph tags.
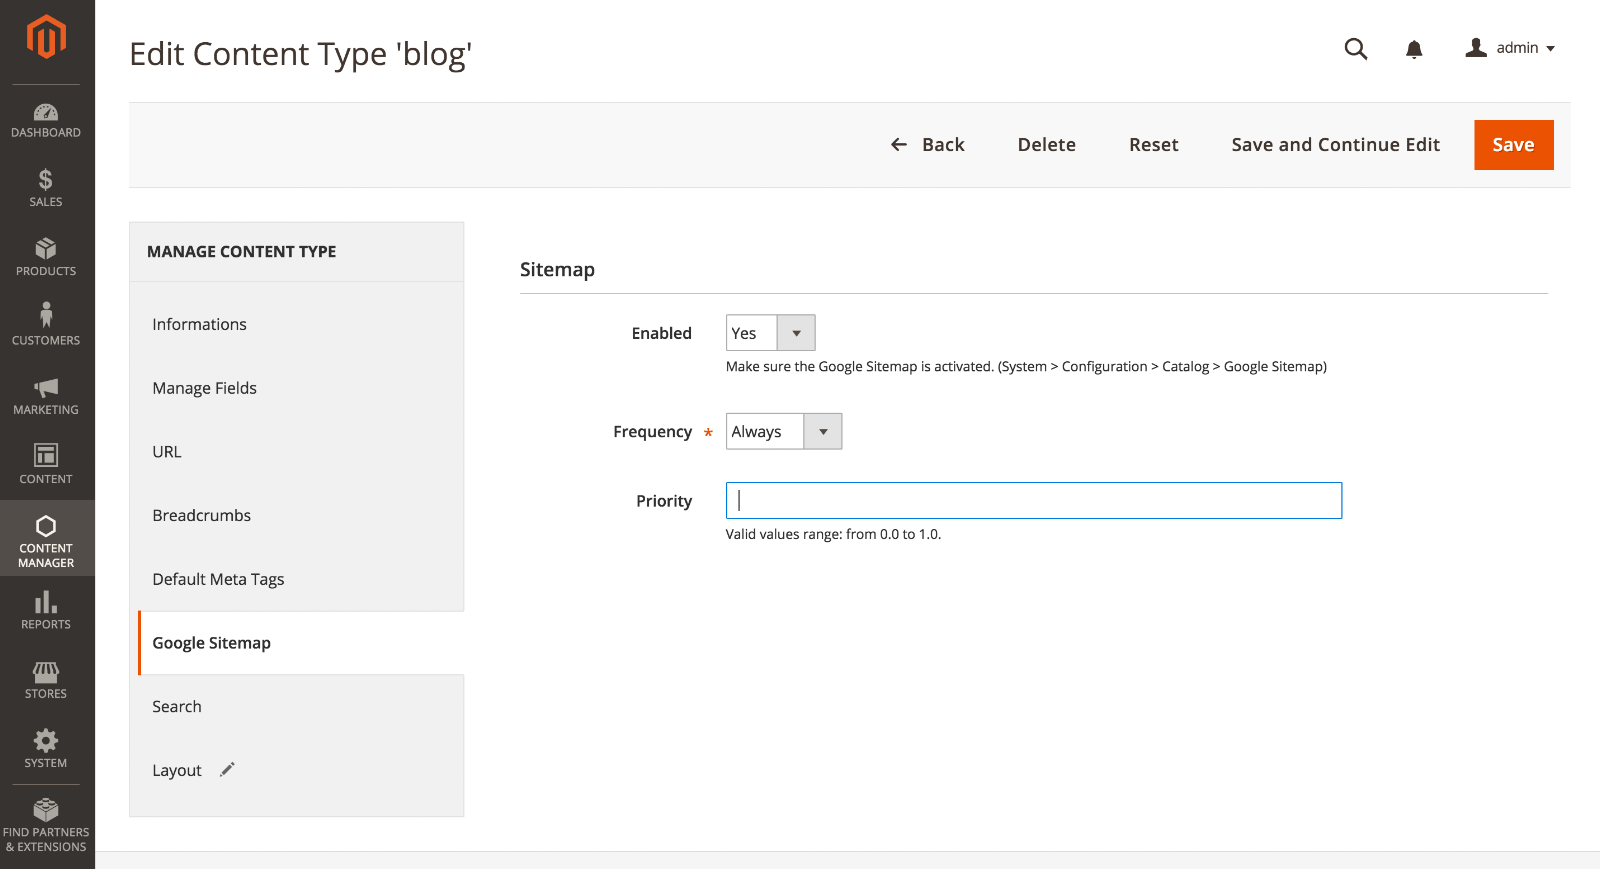
Manage Sitemap
Enable the feature, set the priority and update frequency to be included in your Google Sitemap XML file.